Damaged flooring is hard to ignore — a cracked tile, a buckled hardwood board, or a section of vinyl plank that's come loose draws the eye every time you walk past. In Palm Bay, flooring repair often involves more than just swapping out the damaged piece. Florida's concrete slab construction, high humidity, and Brevard County's clay-heavy soil create conditions where flooring failures have underlying causes — moisture infiltration, slab movement, inadequate original installation. We diagnose the cause before recommending the repair, because replacing a cracked tile on an unstable subfloor just means it cracks again.
We repair flooring throughout Palm Bay — in Port Malabar ranch homes, Bayside Lakes newer construction, Palm Bay Village townhomes, and rental properties across Palm Bay Estates.
Flooring Repair Services We Offer
- Tile replacement — single tile or section removal and replacement, mortar bed repair, grout color matching
- Grout repair and regrouting — cracked, missing, or discolored grout, including color-sealing after regrouting
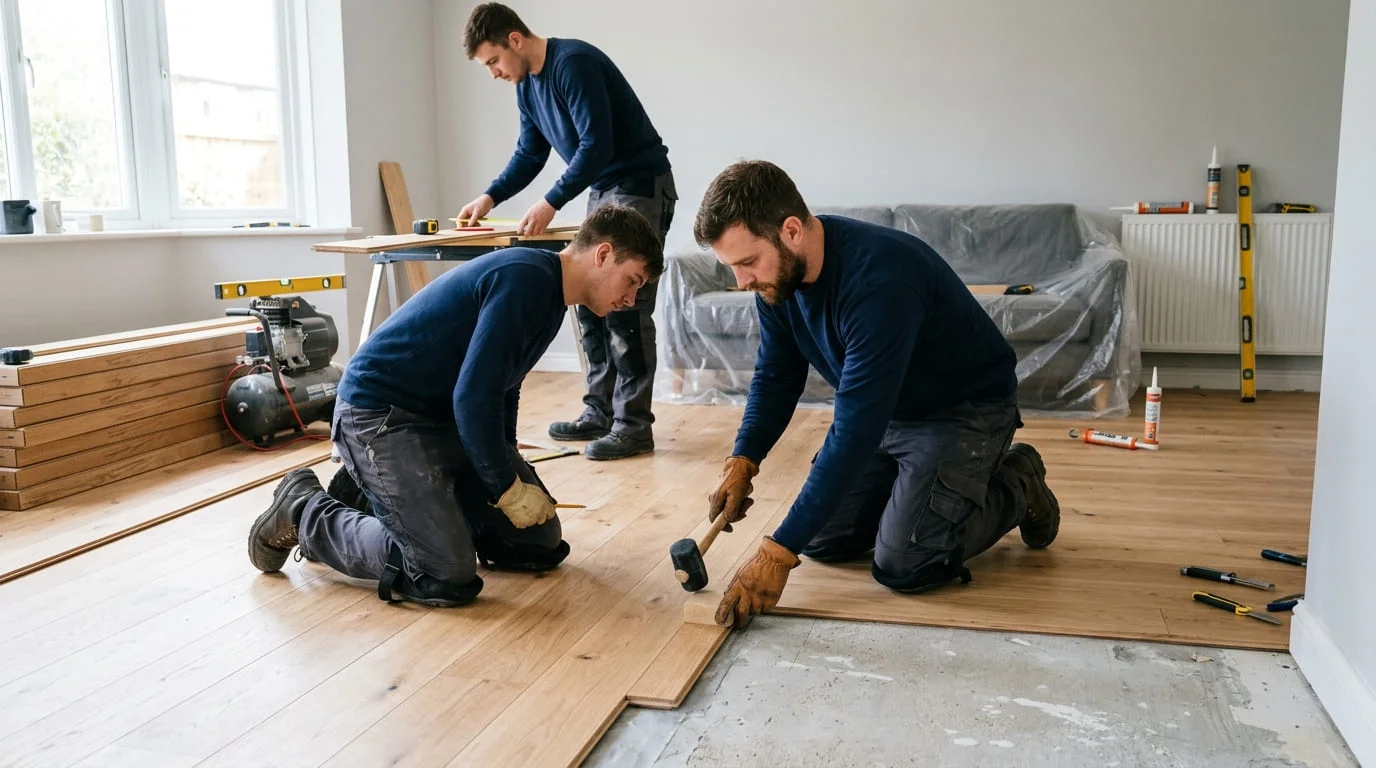
- Hardwood board replacement — individual board swap in nail-down and glue-down installations, stain and finish matching
- Hardwood cupping and buckling assessment — moisture diagnosis, board assessment for drying versus replacement
- LVP and laminate plank repair — plank replacement in click-lock floating floors, glued-down LVP patching
- Subfloor repair — replacing soft, spongy, or water-damaged subfloor sections under tile and hardwood
- Transition strip repair and replacement — T-molding, reducer, and threshold strip replacement between flooring types
- Tile lippage correction — grinding or resetting raised tile edges that are a trip hazard
Why Palm Bay Floors Fail — and What We Look For
Most flooring failures in Palm Bay trace back to one of a handful of local causes. Tile cracking is most often a subfloor flex issue — when the concrete slab beneath the tile flexes or cracks due to soil movement, the mortar bond breaks and tiles crack or hollow out. Brevard County's clay-heavy soil is notorious for expanding with moisture and contracting during dry spells, creating small but repeated movements that stress grout joints and mortar beds over years.
Hardwood cupping and buckling is almost always moisture. Palm Bay's concrete slab construction means hardwood is installed directly over concrete in most homes — and if the concrete's moisture vapor transmission rate isn't properly managed, moisture wicks up from the slab into the wood year-round. Port Malabar homes from the 1980s where hardwood was installed without adequate vapor barriers are particularly susceptible.
LVP (luxury vinyl plank) flooring is the most moisture-resistant flooring option and is increasingly popular throughout Palm Bay for exactly this reason. But even LVP fails when installed improperly — particularly in high-humidity Florida lanai areas or bathrooms where the adhesive bond breaks down with temperature cycling.
Signs Your Flooring Needs Repair vs. Replacement
Not every flooring problem requires the same response, and knowing which signs point to a quick fix versus a larger project saves both time and money. A single cracked tile that sounds solid when tapped (no hollow echo) usually means an isolated impact crack — straightforward to replace. But if tapping reveals a hollow sound across multiple tiles in the same area, the mortar bond has failed across a section, and replacing just the visibly cracked tile won't address the tiles around it that are also debonded and will crack soon. For hardwood, boards that have cupped (edges higher than the center) but are still firmly attached often flatten once the moisture source is corrected — but boards that have buckled (lifted entirely off the subfloor) are usually damaged beyond recovery and need replacement. LVP planks separating at the seams, especially near exterior doors or lanai transitions, often point to a subfloor movement or moisture issue rather than a flooring defect — worth diagnosing before replacing the same planks again.
Our Flooring Repair Process
Flooring repair that lasts starts with diagnosis, not demolition.
- Step 1 — Assess the damage and the cause: we examine the damaged area and surrounding flooring, tap-test tile for hollow spots, and check for moisture using a moisture meter on hardwood and subfloor
- Step 2 — Identify the source: cracked tile from slab movement, cupped hardwood from moisture, or separated LVP from subfloor flex each point to a different underlying issue that needs addressing before the visible repair
- Step 3 — Remove damaged material carefully: tiles are removed without disturbing surrounding tiles where possible, hardwood boards are cut along seams to avoid damaging adjacent boards, and LVP planks are unlocked from the nearest floating edge
- Step 4 — Prep the subfloor: any soft, damaged, or uneven subfloor revealed during removal is repaired before new flooring goes down — installing new material over a bad subfloor guarantees a repeat repair
- Step 5 — Install and match: new material is installed and matched to existing flooring as closely as possible — mortar and grout color-matched for tile, stain matched for hardwood, plank pattern matched for LVP
- Step 6 — Final inspection: repaired areas are checked for level, secure attachment, and visual blend with surrounding flooring
Matching Materials: Tile, Hardwood, and LVP
Material matching is often the hardest part of a flooring repair — and the part that determines whether a repair looks seamless or looks like a patch. Tile is manufactured in dye lots, and even the same product line and color can shift slightly between production runs, so a tile bought today to match one installed five years ago may not be an exact match under close inspection — bringing a sample tile (or even a photo with good lighting) to a Palm Bay tile supplier is the best way to find the closest current match. Hardwood stain matching depends on both the stain color and the existing floor's sun exposure and wear pattern — a freshly stained replacement board will often look slightly different until it ages in, and we set expectations on this upfront. LVP and laminate are the easiest to match if you have leftover material from the original installation, since manufacturers frequently discontinue or update patterns — saving a box of leftover planks during any new flooring installation is one of the best things a homeowner can do for future repairs.
Flooring Transitions: Lanais, Sunrooms, and Exterior Doorways
Some of the most common flooring failures in Palm Bay homes happen at transitions — where interior flooring meets a lanai, sunroom, or exterior doorway. These areas experience the most extreme conditions in the house: direct sun exposure causes more thermal expansion and contraction than shaded interior rooms, and they're the most likely spot for water intrusion during heavy rain or a leaking door threshold. Tile installed across these transitions without a proper expansion joint is prone to cracking along the transition line as the tile on the sun-exposed side expands more than the shaded interior tile. LVP and laminate flooring needs a transition strip at these points for the same reason — without it, the flooring can buckle where two sections push against each other after expanding. When we repair flooring at these transition points, we make sure proper expansion gaps and transition strips are in place, not just replace what failed in the same way it failed before.
Flooring Repair Pricing in Palm Bay
Individual tile replacement: $75–$150 per tile including materials. Grout repair and sealing per square foot: $4–$8. Hardwood board replacement: $15–$30 per board plus subfloor work if needed. LVP plank replacement: $100–$200 per section. Subfloor patch repair: $150–$400 depending on extent. All pricing includes a written estimate before work starts.